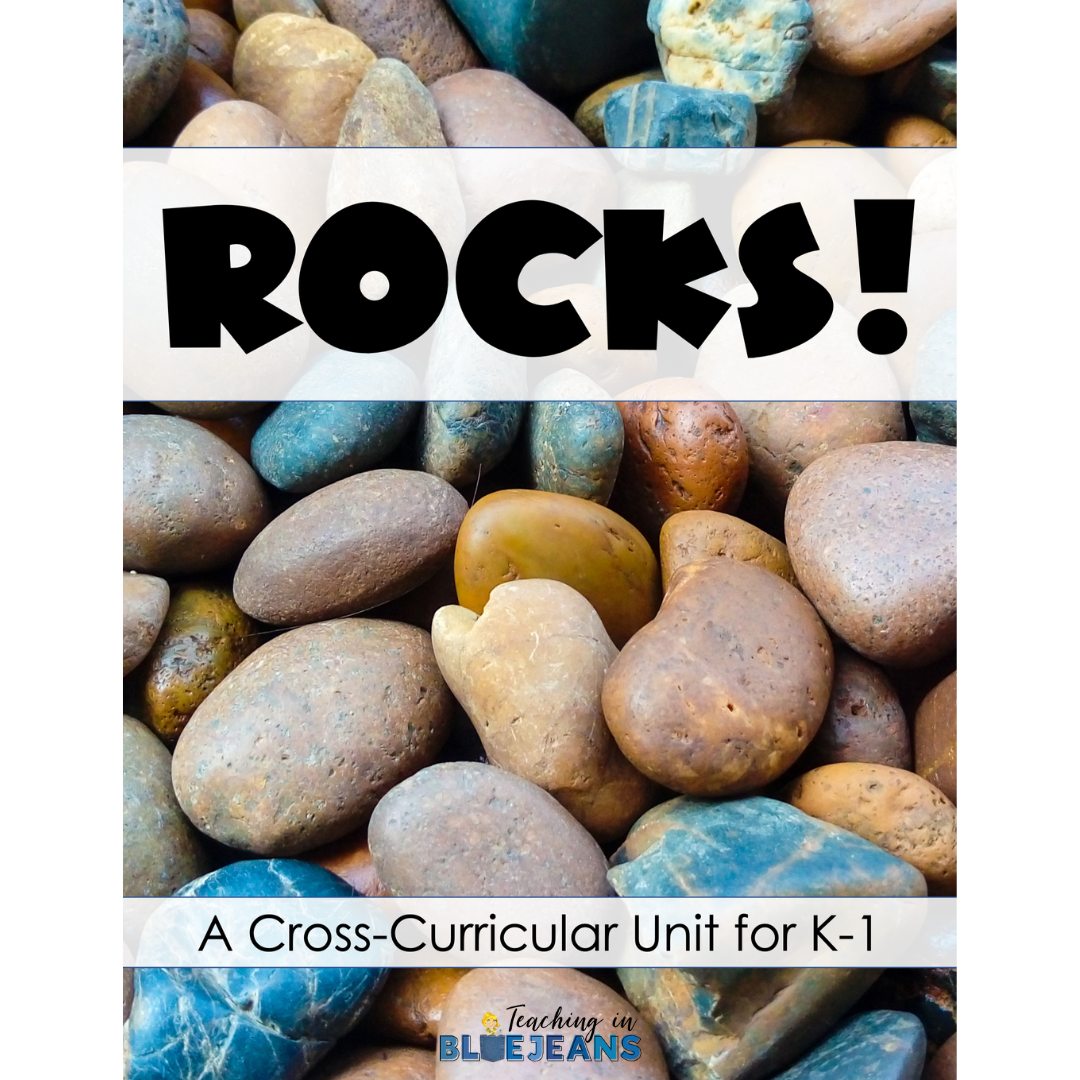
I love teaching science topics in the primary classroom. There are many different physical science and life science topics to be explored at this stage of learning. Students in the early years are so fascinated by these lessons and are always eager to try some hands-on learning activities. This is a recipe for instant engagement and I’m here for it! But what if I told you that you could cover more than just science standards with your lessons? Yes, that’s right! Today we’re going to take a closer look at my favorite cross-curricular unit filled with fun rocks activities for science, ELA, math, and more!
So before we take a look at the components of my rocks activities, let’s chat a little bit about what cross-curricular teaching is and why you might want to use it in your classroom. Cross-curricular teaching involves lessons or topics that blend together math, language arts, science, and more to create a learning experience like none other. All of your lessons and activities will revolve around a central theme, meaning you can target many different standards and skills while learning more about the topic.
This is the key factor that sets cross-curricular teaching apart from thematic teaching. Thematic teaching includes many unrelated activities that tie into a particular theme. Cross-curricular teaching explores a specific theme through related activities that fall under different subject areas. The difference is subtle, but important in my opinion because cross-curricular teaching is more about a particular topic that is to be studied and explored in depth!
There are so many benefits to cross-curricular teaching, but here are just a few that are worth mentioning:
Pretty incredible list of benefits, right?! I certainly think so. I think my favorite on this list is that cross-curricular teaching makes the most of my time and allows me to cover so much more in a single class period. We all know how hard it can be to weave science and social studies into an already full math and ELA schedule. Cross-curricular teaching will allow you to explore fun topics with your students without the worry of losing time in other areas! To read in-depth on these benefits and how they will unfold with cross-curricular teaching, be sure to check out this post next.
Now that we know how cross-curricular teaching will benefit you, let’s take a closer look at my All About Rocks Unit and the topics covered inside. As I mentioned above, this science unit includes a whole lot more than science! I love this because it means we can study an interesting topic while still targeting other important skills simultaneously. Here are all of the subjects and skills covered in this unit:

As you and your students work through the rocks activities together, you’ll not only be learning more about the physical properties of rocks and recording observations, but you’ll also be targeting important math and language arts standards! This is a primary teacher’s dream if you ask me! This also tends to be an extremely engaging format to teach in since it appeals to a wide variety of interests! You mathematicians and avid writers alike will love these rock activities!
So how does teaching this unit unfold? So glad you asked! Let’s walk through how I use this unit in my room together!
Any great lesson or new unit must begin with an attention-grabbing introduction. This is a MUST in my opinion since it will set the expectation for what’s to come! I want my students to be eager and excited to explore these rocks activities, so I always start with a fun video to open the conversation about rocks. This video is great because it focuses on observing and describing what we see when examining rocks and minerals. This is an important distinction when studying rocks in kindergarten and first grade. At this stage, we are working on observing and exploring the physical traits, not learning the rock cycle. Keep this in mind as you look for other materials and books to supplement your learning activities.
Speaking of books, next in our lessons we typically use my Rocks Emergent Readers to continue exploring this topic. I like to use a full-page, color reader during whole-group learning with my class and then provide each student with a mini reader during small groups.
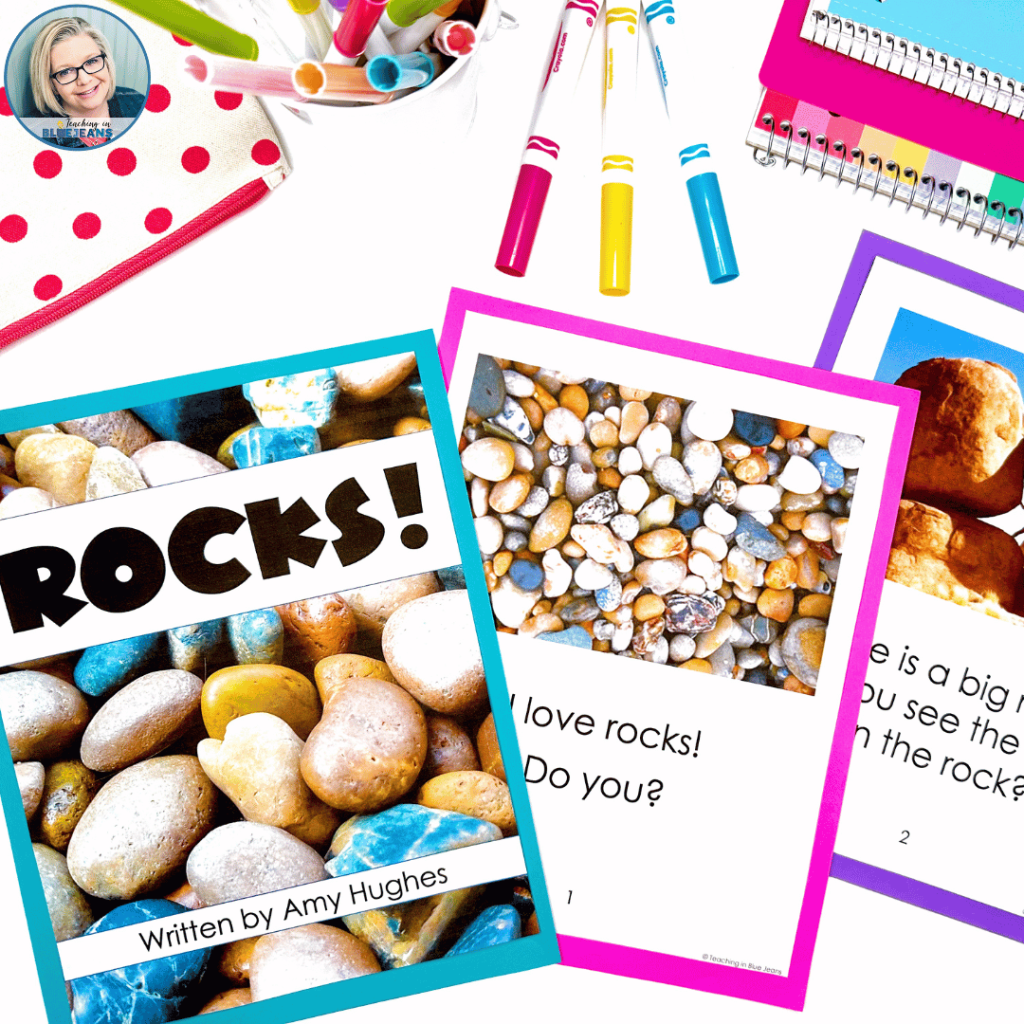
The readers we use were crafted with young learners in mind and focus on the following sight words: here, is, are, do, and you. This makes them easy to understand as I read aloud and just as easy to read independently when we move to small groups!
Another great feature of these Rocks Emergent Readers is that they introduce some important vocabulary for this unit such as rock, big, little, bumpy, smooth, hard, and soft. These words are important to cover since they will be used again to describe the physical traits of the rocks we explore in our unit.
My favorite thing about these readers though is the real pictures. This helps students visualize and understand each of the words we’re covering. The real pictures make it easy for students to make connections to the world around them in a way that clip art doesn’t always allow for.
Speaking of vocabulary, why not add those new words up on your word wall, or display them in a pocket chart as you explore rocks in the classroom? This unit includes vocabulary word cards with real pictures to use in your lessons. I tend to go through these words a few times over the course of our study and ask students to help define them to check in on understanding.
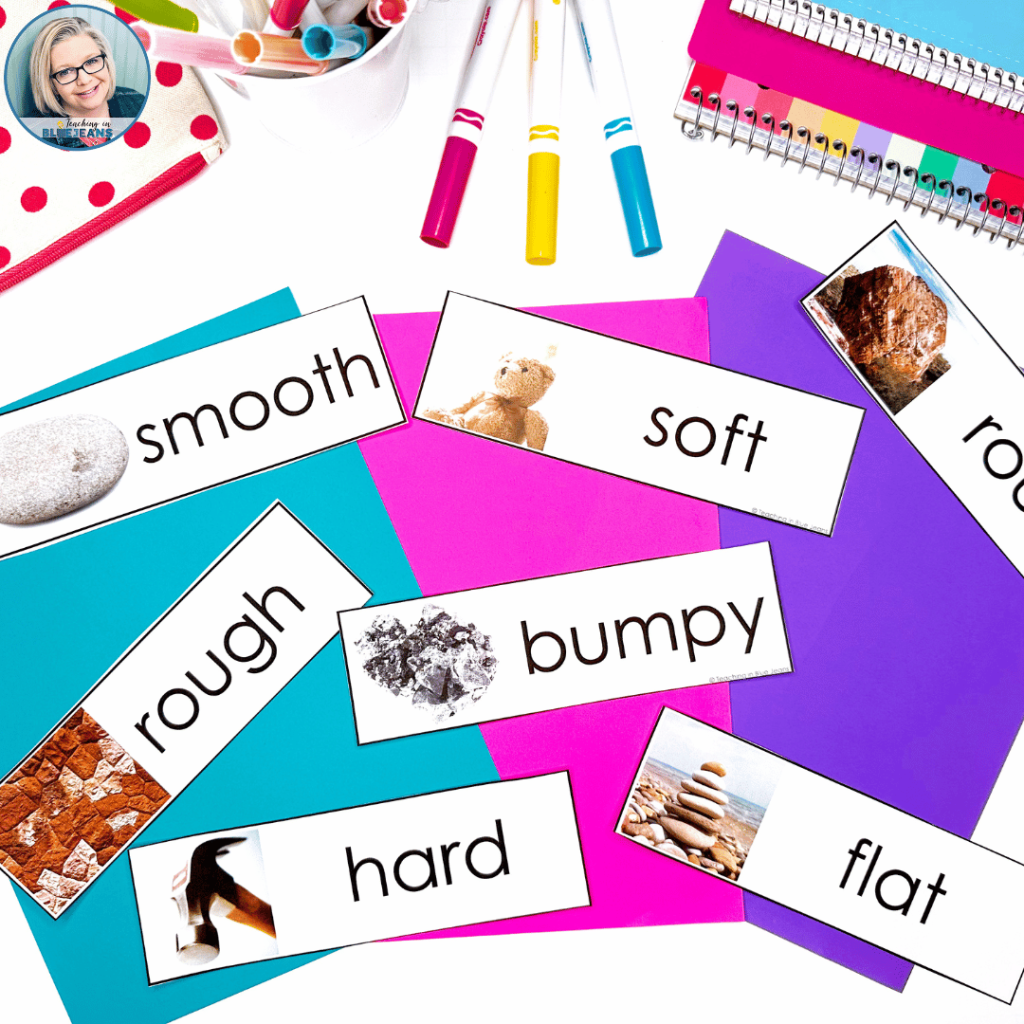
In this unit, the vocabulary words focus on different rock properties that students can observe. But . . . there is a little twist too! Each of the rock properties also has an opposite. By introducing those as vocabulary words we can make that cross-curricular connection with language and study opposites as well.
We also use some fun opposites worksheets to practice matching descriptive words to pictures. These activities help set the stage for our rocks activities, so they’re great to begin the unit with before we move on to deeper exploration! Once the vocabulary words have been introduced, we use them in our speaking and writing during the unit to help reinforce them.
After your introduction with videos, books, readers, and vocabulary, I’m willing to bet your students will be pretty excited to dive into some hands-on learning activities! This is where the magic happens and engagement truly soars. When it comes to rock activities for the primary classroom, there are many different things we use to learn more. Here are some of my favorites.
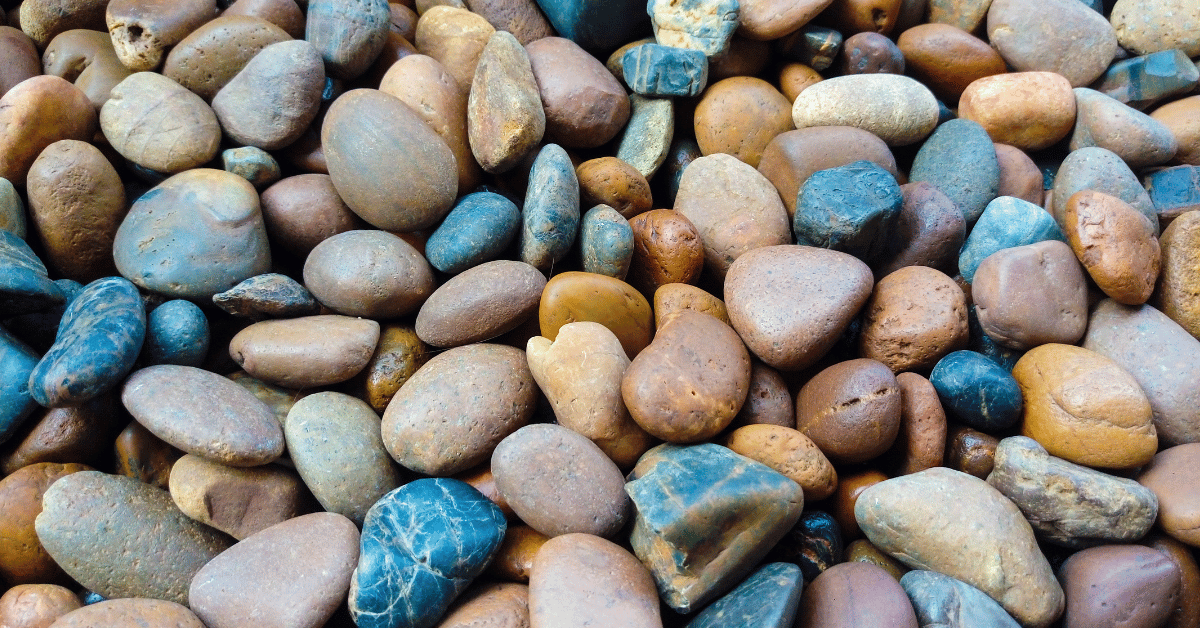
During our time working through this unit, I like to gather a wide variety of rocks and set them up for observation and investigation in the science center. I try to find rocks of varied sizes, shapes, colors, and textures. I also like to add some magnifying glasses and mini notebooks with writing tools to this center so that students can take a closer look and explore the rocks as well as draw or write what they see. Oh, and you might even consider placing your vocabulary cards in this area to prompt some descriptive writing too!

This is a fun activity that you can invite students to explore with a partner during your center rotations. I like to keep it open-ended and let them get creative with this activity – I am always surprised to see what the students draw or write after being given this opportunity!
Teacher Tip: This likely goes without saying, but before you send students off to explore rocks independently, be sure to have a quick chat on expectations for the center. The last thing we want is to have rocks going home in pockets, or flying across the room – right? Letting students know what they can and can’t do with the rocks is always a good idea!
After some hands-on exploration, it’s time for a deeper dive! I use a variety of math and writing activities alongside science skills such as observation and describing the physical traits of rocks.
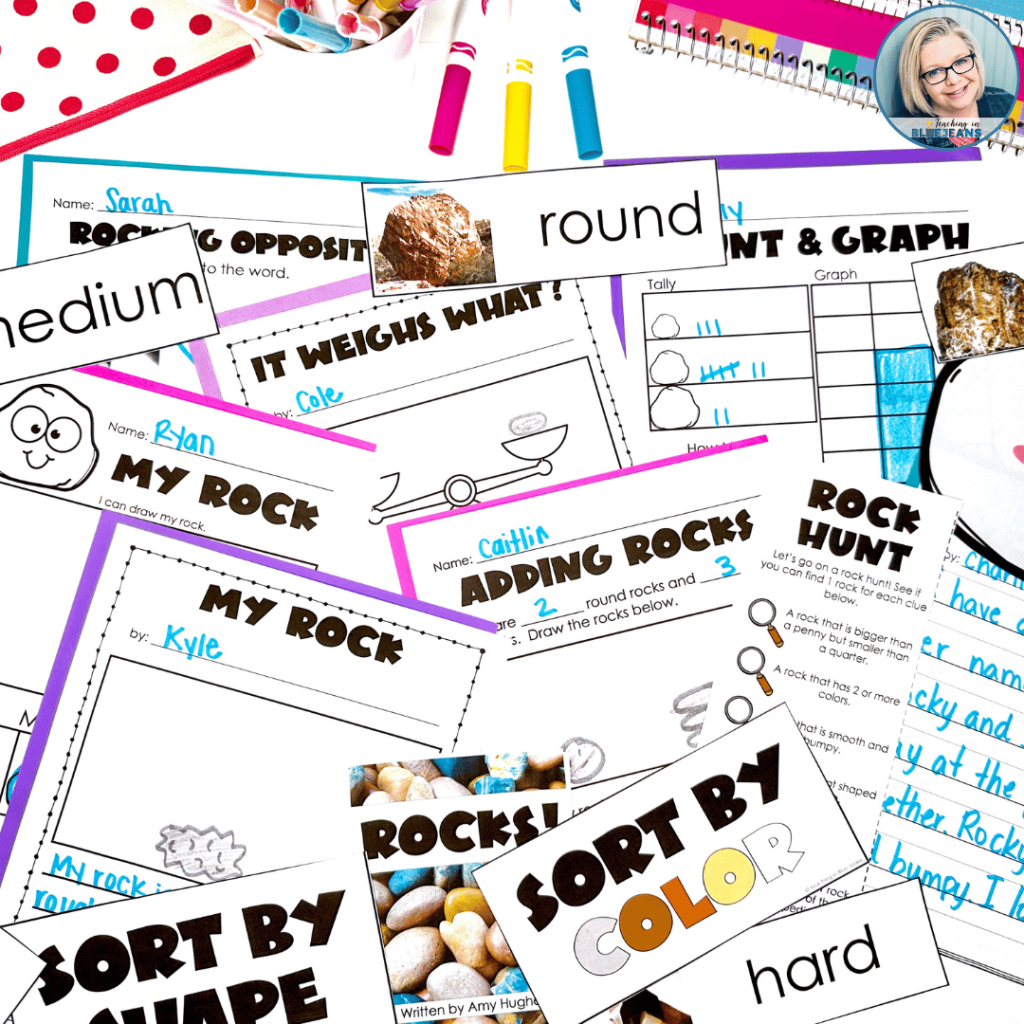
First up, let’s go on a rock hunt! I provide students with magnifying glasses, clipboards, and a recording sheet for this activity and then take them out to search for rocks! In true scavenger hunt style, students aren’t just looking for rocks, but trying to find rocks that meet different criteria.
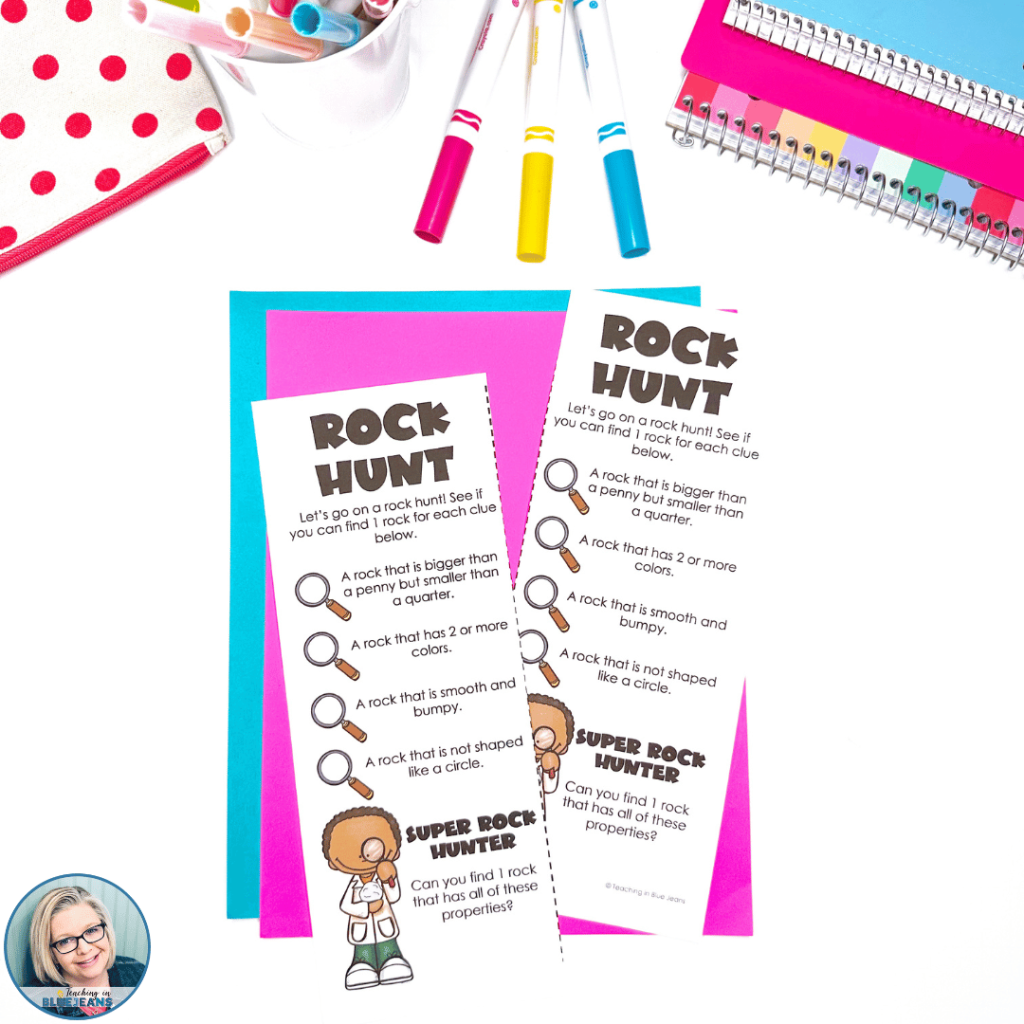
Each item on the rock hunt is designed to reinforce vocabulary words or other grade level appropriate concepts. For example, students are challenged to find a rock that is both smooth and bumpy, and/or one that is bigger than a penny but smaller than a quarter.
This scavenger hunt is a lot of fun and the students love to explore and try to meet all the criteria with a single rock. After the hunt, we have a chance to show off the rocks we found. It’s a great way to get students describing their rocks using the vocabulary words they have learned.
Plus, once we have finished, I have them select one rock to keep as their own for our next activities. This activity can also be sent home to have students compete and return with a parent or family member. Then, they will bring their found rocks to school by a specific date.
Next up, is an activity that I call “My Rock”. In this one, students will choose a rock to use for their investigation and then record some of the things they discover. You can provide rocks for students, or have them find or bring one in to use from the hunt activity above. Either way is a lot of fun but I find that students love to choose their own.

In this activity, students will complete a variety of prompts to help describe the rock they are using. First, they draw their rock, and then they describe the texture, color, size, and shape. I like to complete this activity as a whole group so that I can ask questions and give suggestions to the whole class at once. Each child works at their desk with this worksheet and their rock to describe it in depth.
Then, we complete a writing activity where students are asked to write a sentence or two to describe their rock using the characteristics they noted on their page. Encourage students to build those sentences using the words on their worksheet and your vocabulary cards. It’s a great way to add some expository or nonfiction writing to the lesson. And. . . since they have already done the observations their focus is the sentences in this part of the activity.
Next up, we use math to explore the weight of our rocks. You’ll need some small classroom balance scales for this activity, and you might want to do this activity in small groups to help assist students and make sure everyone knows what to do. On another note, this is a great activity to practice patience and taking turns – a big skill in kindergarten!
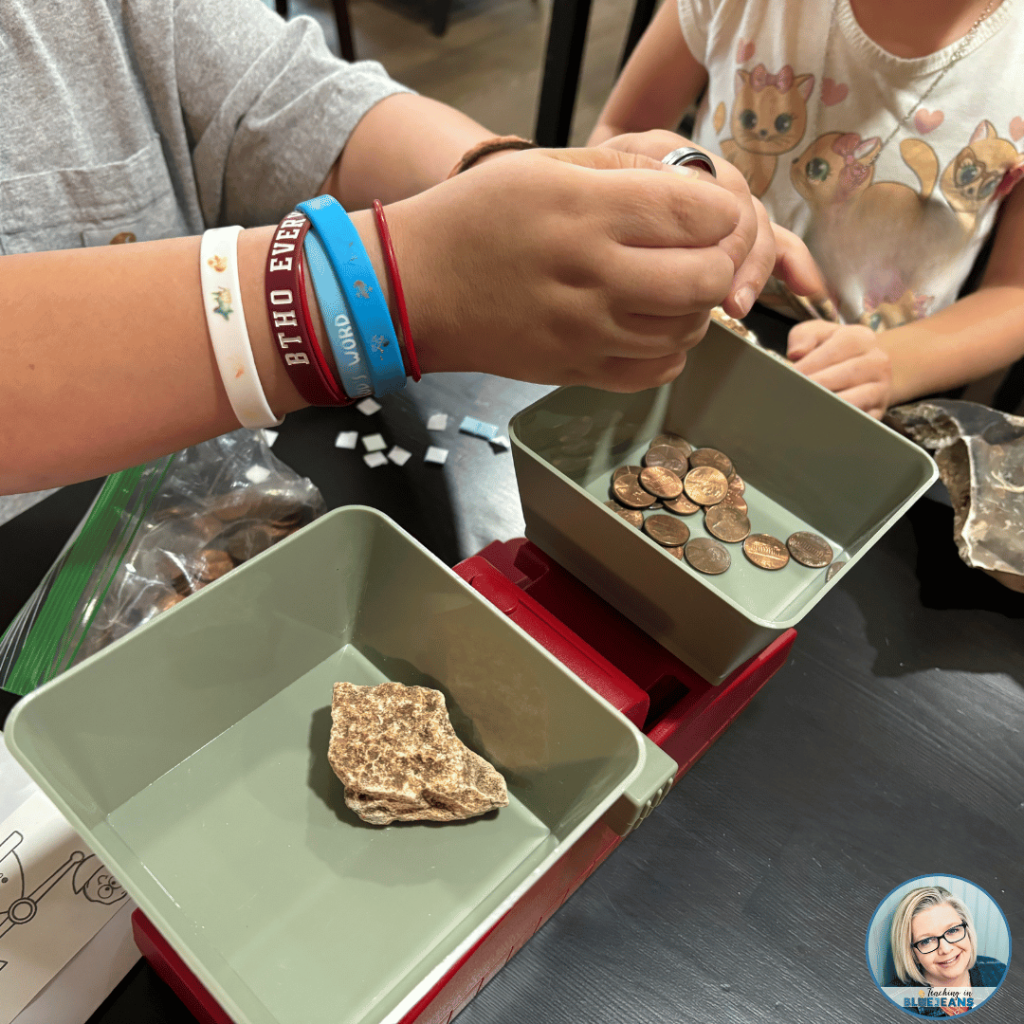
Students will follow along with the directions on their page to compare the weight of their rock against materials such as cubes, pennies, and crayons. They will set their rock on one side and fill the other side with materials to see how many they need to be heavier or lighter than each other.
I like to show students an example first, so they can watch me slowly adding crayons, cubes, or pennies one at a time and counting as I go. They love comparing their results with their friends in the group as everyone takes a turn! I have also included some writing pages for additional reflection and observation after your students have finished weighing their rocks.
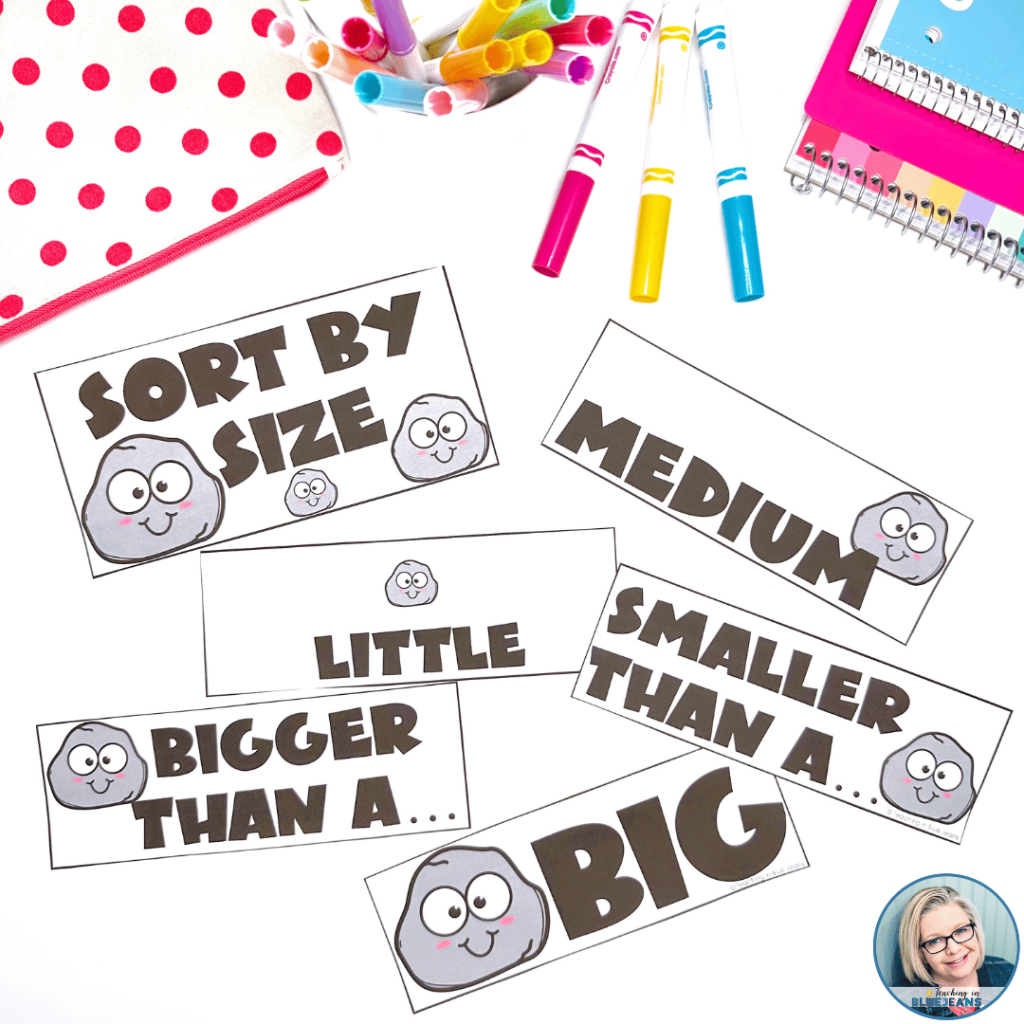
Finally, we pool all of our rocks together for some sorting and classifying activities. The rock unit includes a variety of sorting cards that can be used. I love to sit in a circle on the carpet and lay the cards out in the middle of the circle. Then I have each student sort their rock according to the criteria. While they are putting their rock in the right place, they also explain why they chose that category. It’s a great way to weave in some critical thinking skills and oral language.
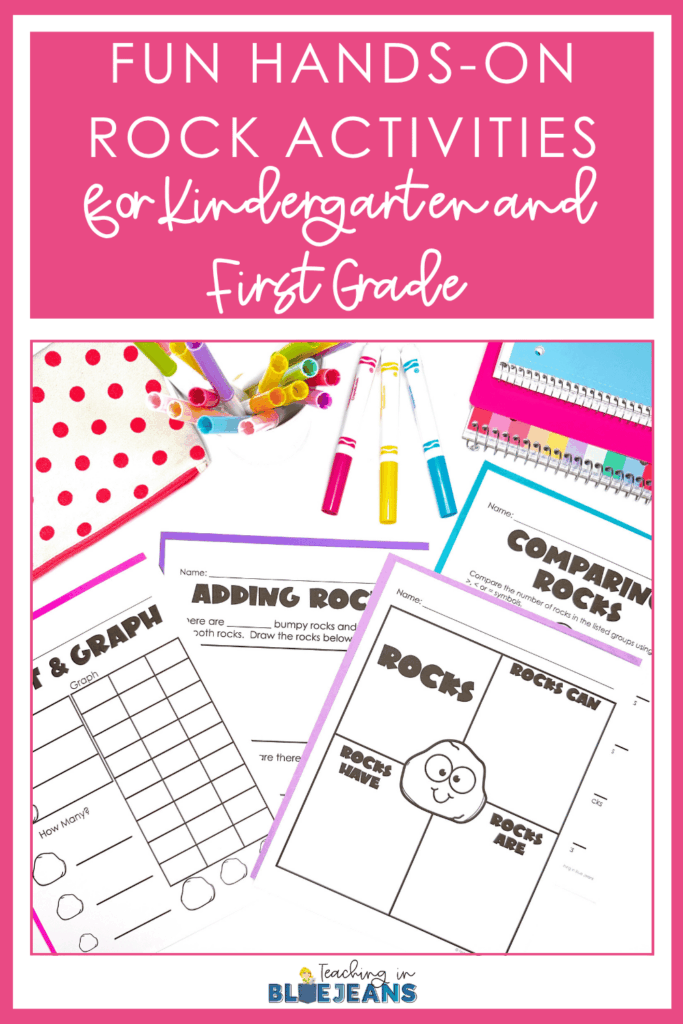
There are multiple sorting options so I like to complete one sort each day. After we are done sorting then students use the related activity page to complete based on the day’s sorting activity. A couple of days focus on counting and graphing the sorted rocks. Other days weave in other math skills like addition and comparing numbers.
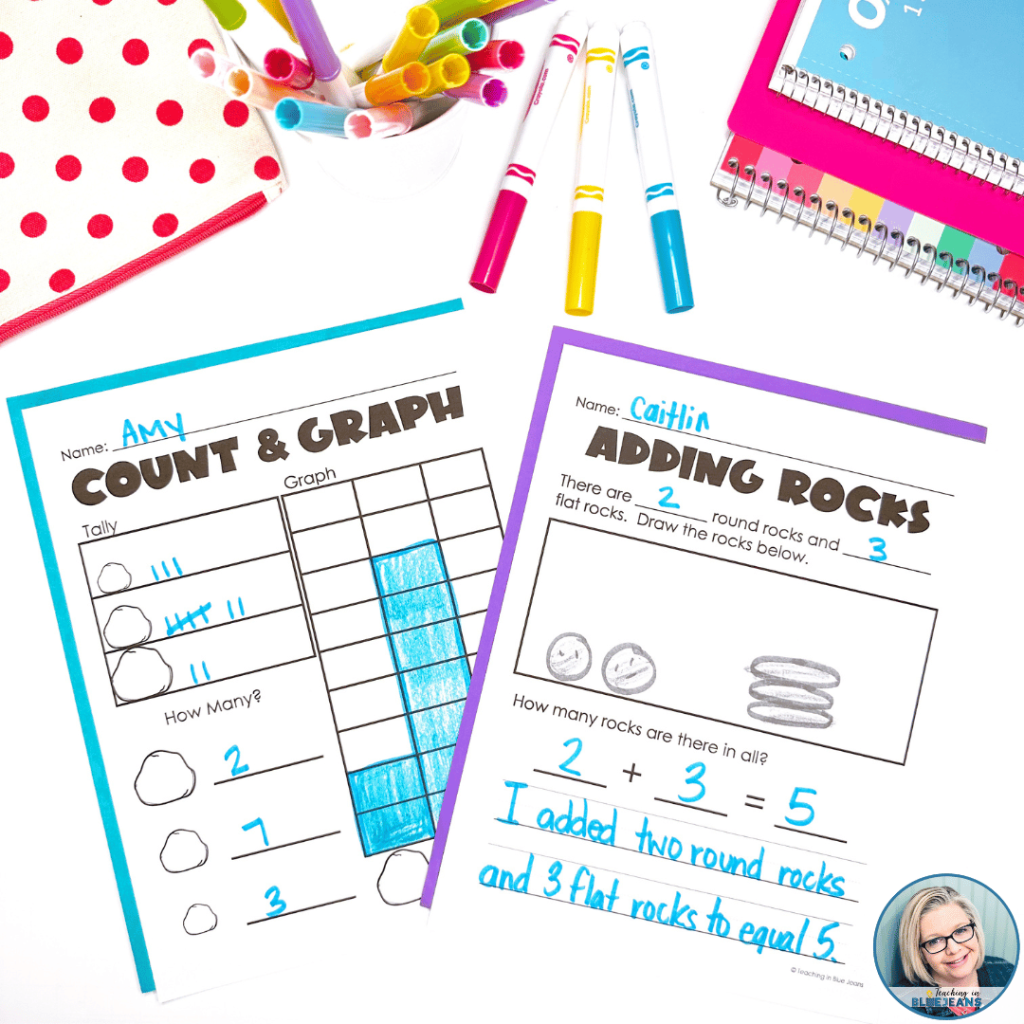
An example of this activity would be sorting the rocks by size. Begin by laying out the 3 sorting size cards. Then ask each student to sort their rock and explain their choice. Once the sorting is done, each student receives the sorting by size Count & Graph activity page. Students will count the number of rocks in each category and write that on the page. Then they will fill in the tally marks and bar graph for each size. It’s a great way for them to see how data collection and analysis connect to real-world activities. Finally, we finish up with some discussion focused on analyzing the data.
Last, on this list, we finish up our rocks activities with some writing fun. The unit includes writing paper along with a cute rock page topper that you can use to create a finished writing craftivity. There are so many options you could use these resources for.
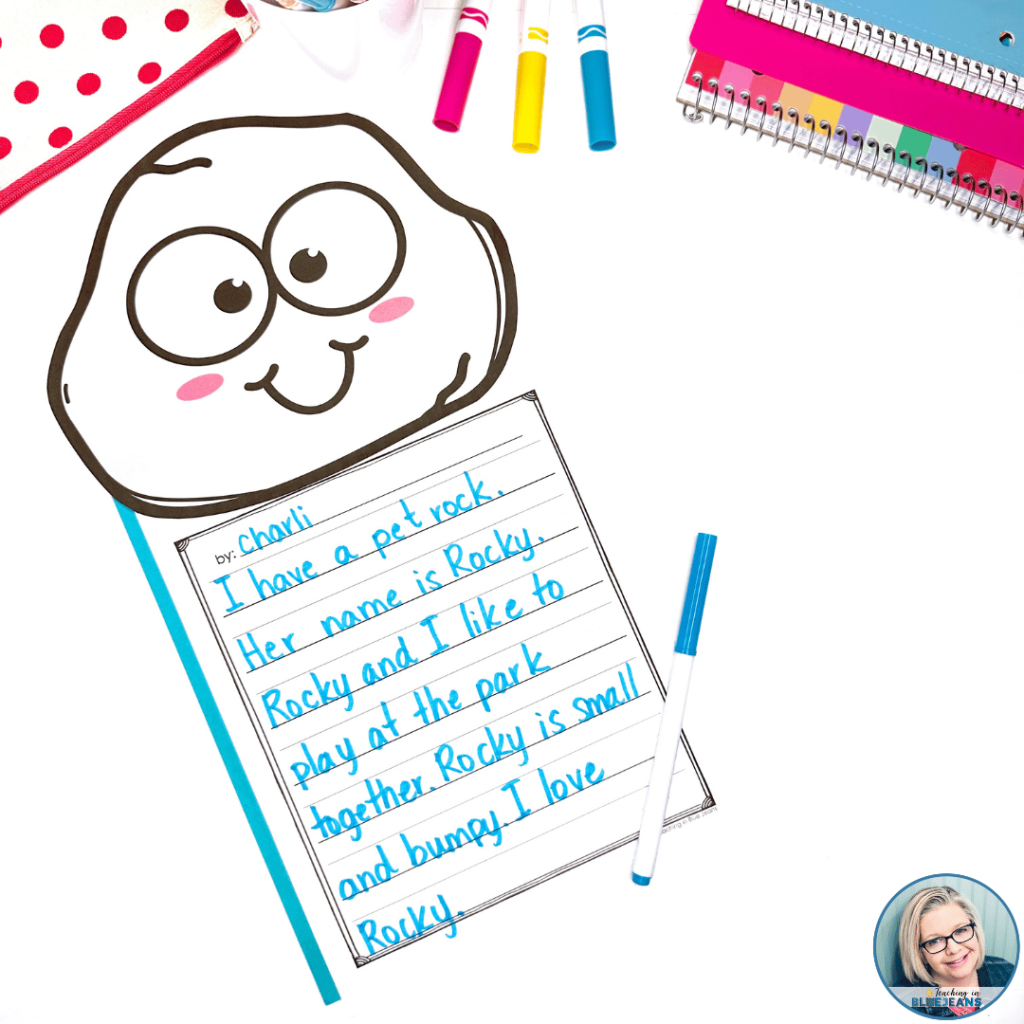
You could take your My Rock expository writing (mentioned above) and use this for a final draft. It is a great way to introduce your students to the steps of the writing process. Or you could use the rock writing craftivity with a writing prompt that gets students writing about what they have learned in the unit. Both are great ways to add some nonfiction writing to your lessons.
But why stop there? This writing craftivity is also great for some creative writing too! You can add even more fun to your rocks activities unit by incorporating rock art and painting the rocks that your students collected to finish up the unit. This is a great creative art activity that everyone will love. Extend it even further by having students use the pages from the unit to do some creative writing about how they decorated their rock and why. You might even consider making pet rocks with personalities of their own and writing about that too! The possibilities are endless.
The final writing project makes a great bulletin board or hallway display. I don’t know about your kids, but mine always love seeing their work posted. Parents, teachers, and other students like looking at them too.
Do you LOVE this cross-curricular unit? Good news… you can find all of these great activities in one cohesive unit with everything you need to teach these rocks activities in your room! My All About Rocks Unit is filled with all of the great resources mentioned here including:

You’ll have everything you need to explore rocks in a meaningful way at your fingertips! Grab the full unit to simplify your planning and make cross-curricular teaching a breeze in your room! I know you and your students will love exploring rocks together!
If you loved these Rocks Activities, you’ll probably love my Cross-Curricular Pumpkin Unit too!
Be sure to pin this post on Pinterest to keep track of these fun rocks activities and lessons for your primary learners!